Creating
Hand Painted Textures
|
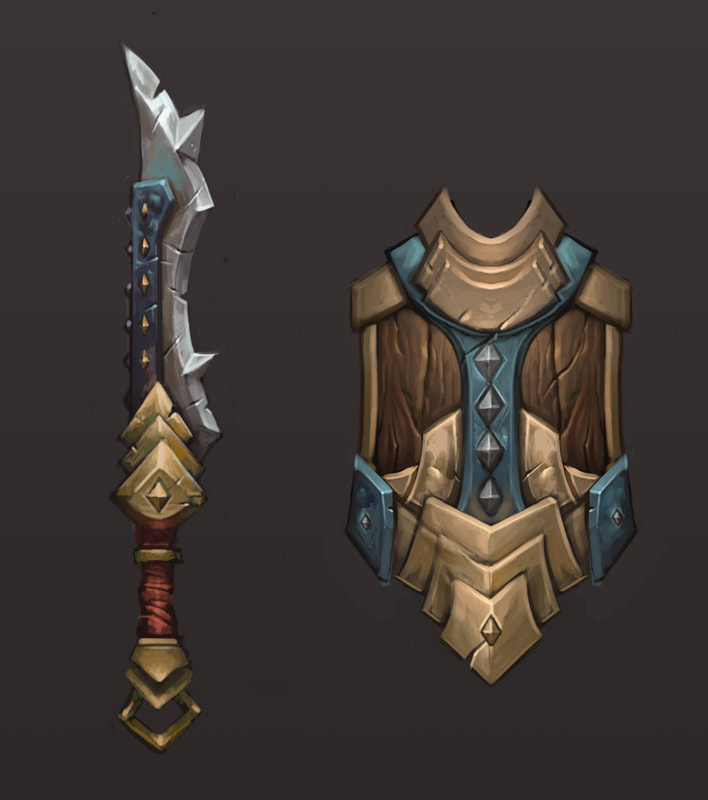
My love for this style has been around for quite a while, so in December of last year, I decided to purchase a tutorial called Learn the "Hand-Painted" Texturing Style for Video Games by Tyson Murphy on Udemy. Even though I bought this almost a year ago now, I've never actually gone through it, and now is a perfect time. 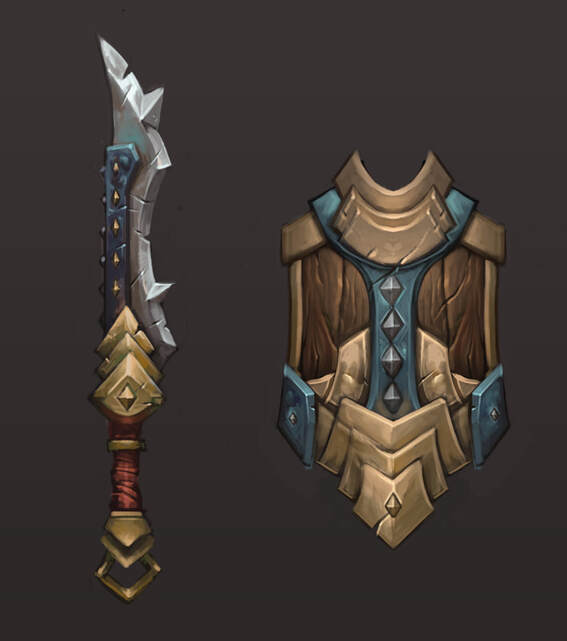 In this tutorial, Tyson takes us through his process on modeling and creating hand painted textures for a sword and shield based off of concept art, using Maya and taking the model UVs into Photoshop to paint the textures on. For my Proof of Tech, since I'm only focusing on how to create the textures and not modeling, I'm just jumping right to the part where Tyson starts texturing the sword. Getting Ready Tyson starts by taking a snapshot of his UVs and bringing them into Photoshop. Using those UVs he creates a mask for easy Island selection and painting, and always has the mask selected but hidden on it's own non-visible layer. He then creates a new layer and fills the mask with the brown/grey he chooses for the base layer of his sword, saves it and loads the PSD file onto his model in Maya with no lighting so he can see what he's doing, as well as looking at the model to visualize where lights would be and how it would hit the model and show as a texture. The texture size should be larger than you're going to have it on the model, so you can add in details and everything, then you can shrink it down to the correct size and sharpen the image. Tyson creates the texture on a 1024x1024 canvas then when it's finished he scales it down to 512x512 and sharpens the image. Starting to Paint
The Details
Final Touches
The Finished Look 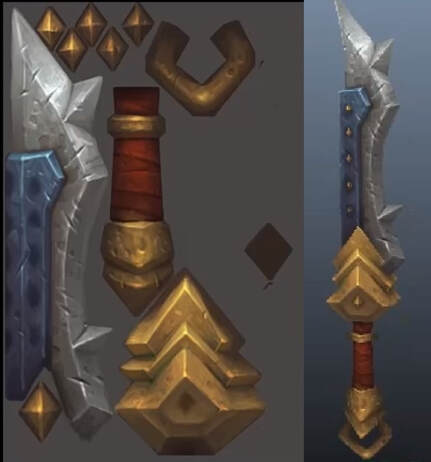 After listening through Tyson Murphy explaining and showing off his process for making these materials, there's a lot of helpful information to take away for this method of texturing.
0 Comments
Leave a Reply. |
AuthorHey there, my name is Taylor Gillett and this is my journey through better understanding and creating hand painted textures! ArchivesCategories |
 RSS Feed
